Last updated: August 22, 2026
Ask around before buying your first serger and you will hear the same warning from three different people: it is a great machine but the threading will make you cry. That warning is why sergers get bought in January and are still in the box in June. It is also mostly wrong, but only if you pick a machine with a threading layout you can actually see and follow.
So this guide ranks beginner sergers on the thing that actually decides whether you use yours: how hard it is to thread, how visible the path is, and how forgiving the machine is when you get it wrong. Stitch quality at this end of the market is broadly similar, so it is not the deciding factor.
This article contains affiliate links. If you buy through them, we may earn a commission at no extra cost to you. Learn more.
Quick Answer
Which serger is easiest for a beginner to thread?
- Color coded lay in threading is the feature that matters. Every machine below has it.
- Brother 1034D: the most owned, the most tutorials, the machine your class will be teaching on.
- Brother 1034DX: the later revision, with a LED lamp and the stitch controls moved to the front.
- Air threading removes the looper step entirely, but those machines sit above the home price bracket and mostly in dealer stores.
Bottom line: pick any color coded three or four thread machine, learn the order once, and use the tie on trick from then on.
What Makes a Serger Beginner Friendly
Four things, in order of how much they matter. A color coded threading path you can follow without the manual. A front door that opens wide enough to see both loopers. Differential feed with a dial you can reach while sewing. And a stitch set that covers four thread overlock, three thread overlock and a rolled hem.
Notice what is not on that list: number of stitches, top speed and included feet. At this end of the market those are broadly the same across brands, and a machine with 22 listed stitch functions is not doing more than a machine that lists fewer, it is counting the combinations differently.
What Color Coded Actually Means
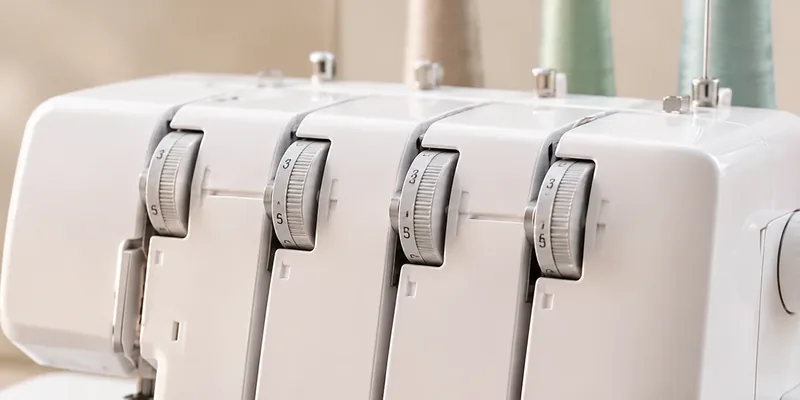
Each of the four thread paths is printed on the machine in a different color, from the guide bar down to the looper or needle. Lay in threading means the thread drops into an open channel rather than passing through a series of closed eyes, so you can seat it with a finger instead of tweezers for most of the run.
Beginner Sergers by Situation
Four machines cover the beginner market in the United States, and they sort by what you will run into in the first year rather than by spec sheet. Pick on the threading layout, on whether you want two thread stitches, and on how much sewing you expect to do each week.
Best First Serger Overall
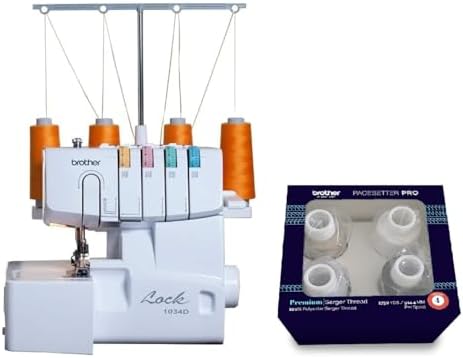
The Brother 1034D is the machine to buy if you want the least friction. Brother lists three or four thread operation, color coded lay in threading, differential feed and a maximum of 1,300 stitches per minute. Its real advantage is not on the spec sheet: there is a video for every question you will have, because more people own this machine than any other in its class.
If You Want the Newer Layout
The Brother 1034DX is the later revision of the same machine and stitches identically, with Brother listing the same 1,300 stitches per minute. What changed is the living with it: a LED lamp instead of a bulb, the stitch controls moved where you can reach them without leaning around the machine, and a redesigned trim trap.
Best If You Want Two Thread Stitches Too
The Singer ProFinish 14CG754 runs two, three or four threads, which adds two thread overcast and rolled hem options that the Brothers do not offer. Singer lists a differential feed range of 0.7 to 2.0, a stitch length of 2.0 to 4.0 mm, adjustable cutting width and a LED light. The threading path is open and clearly marked.
Best If You Already Know You Will Sew Weekly
The Juki MO-654DE is the machine people move to and often the one they wish they had bought first. Juki lists two, three or four thread operation and a maximum of 1,500 stitches per minute. It is heavier, which is why it stays put on the table, and the feed is smoother on lightweight fabric than the entry machines are.

The Tool That Makes Any of Them Easier
The lower looper eye hides behind the knife, in a gap that is a genuine nuisance without the right tool. Long curved tweezers turn the fiddliest step of threading into a quick one, and a looper threader wire helps on the machines where the eye sits deepest.

Comparing the Beginner Machines
All four make the stitches a home sewer needs. What separates them is the number of threads, the published speed and what the machine is best suited to once you are past the first month.
| Model | Threads | Listed top speed | Best suited to |
|---|---|---|---|
| Brother 1034D | 3 or 4 | 1,300 spm per Brother | A first serger with the most support online |
| Brother 1034DX | 3 or 4 | 1,300 spm per Brother | Same machine, better light and controls |
| Singer ProFinish 14CG754 | 2, 3 or 4 | 1,300 spm per Singer | Two thread stitches and rolled hems |
| Juki MO-654DE | 2, 3 or 4 | 1,500 spm per Juki | Weekly sewing, smoother feed, heavier body |
The thread counts and speeds above come from the manufacturers’ own product pages and listings.
Air Threading, and Why There Is No Card for It
Air threading solves the looper problem outright. You drop the thread into a port, press a button, and a jet of air blows it through the looper tube and out the other end. Juki’s MO-1000 uses this system, and so do several Baby Lock machines, which is what those brands are known for.
The honest part: those machines sit well above the bracket the machines above occupy, and Baby Lock is a dealer only brand in the United States, so there is nothing for us to link to. If threading is genuinely the thing standing between you and a serger, visit a dealer and try one, and read our air threading guide first so you know what you are paying for.
The First Week: What to Expect
Set aside an afternoon and do not start on a project. Thread the machine following the printed order, run a chain in the air, then sew scrap after scrap while you turn the differential feed dial and watch what happens to a strip of jersey. That single exercise teaches you more than any tutorial.
Then rethread it deliberately, from scratch, a second time. The first threading is a chore, the second one takes half as long, and by the third you stop thinking about it. Our threading walkthrough lays out the order and the tie on shortcut you will use from then on.
Buy the Thread Before the First Project
A serger needs four cones at once and it goes through them faster than you expect. Cone thread is lighter than all purpose sewing thread so that four passes of it do not thicken the seam, and cones sit properly on the spool pins. Black, white and a mid gray will cover most of your first projects.
Frequently Asked Questions
Is a serger harder to use than a sewing machine? The sewing part is easier, because the knife keeps the edge straight and there is no seam allowance to steer. Only the threading is harder, and that is a sequence you learn once rather than a skill you build over months.
How many threads does a beginner need? Four, with a three thread option. The four thread overlock is the standard garment seam and the three thread covers lighter edges and rolled hems. Two thread stitches are a bonus, not a requirement.
Should I buy an air threading serger to skip the learning curve? Only if the budget is genuinely there. Air threading machines sit in a much higher bracket and largely in dealer stores. Most people learn the manual sequence in an afternoon and never think about it again.
Can I take a class on my own machine? Usually yes, and it is the fastest route. Community centers, quilt shops and sewing stores run beginner serger sessions, and many teach on the Brother 1034D, which is one more reason it is a safe first choice.
Do I need special needles? Check the manual for the needle system your machine takes, since it varies. Some home sergers use standard household needles and others take a dedicated system. Whatever the system, change the needle far more often than you think you need to.
What if I get it home and cannot thread it? Take a photo of the inside of the door before you start, follow lower looper, upper looper, right needle, left needle, and check that the presser foot is up so the tension discs are open. Almost every failed first threading is one of those two things.
The Bottom Line
Buy the machine with the clearest threading path and the biggest pile of tutorials behind it, which for most first time buyers means the Brother 1034D or its DX revision. Spend the first afternoon threading and testing rather than sewing, buy four cones before you start, and keep a pair of curved tweezers by the machine. Read next: our serger buying guide and the Brother 1034D review.