Last updated: August 22, 2026
The first evening with a new machine almost always ends the same way. The threading diagram is printed on the body in small gray arrows, the manual reads like it was translated twice, and the test scrap comes out with a bird’s nest of loose thread on the underside. At that point most people assume the machine is faulty. It almost never is.
Threading is a route, not a knack. There are seven or eight points the thread has to pass, in order, with the presser foot in the right position, and the machine sews properly the moment all of them are correct. Once you know why each point exists, you can rethread any machine in under a minute and diagnose your own mistakes.
This article contains affiliate links. If you buy through them, we may earn a commission at no extra cost to you. Learn more.
Quick Answer
How do you thread a sewing machine without guesswork?
- Raise the presser foot first. That opens the tension discs so the thread can seat between them.
- Turn the handwheel toward you until the take up lever is at its highest point, so you can catch it.
- Follow the numbered arrows on the machine: spool, guide, down the channel, around the bottom, up to the take up lever, down to the needle.
- Thread the needle front to back on almost all home machines, then draw up the bobbin thread.
Bottom line: presser foot up, take up lever at the top, then follow the printed numbers. Those two setup steps are what people skip.
The Two Setup Steps Everybody Skips
Raise the presser foot, and turn the handwheel toward you until the take up lever is at its highest point. Do those before touching the thread and most threading failures disappear. They are not optional refinements; they are what makes the rest of the path possible to complete correctly.
The presser foot lever is mechanically linked to the tension discs. Foot down means the discs are clamped together and your thread slides across the outside of them instead of between them. The seam then has no top tension at all, which produces loops on the underside that look exactly like a bobbin problem and are not.
Threading the Top Thread, Point by Point
Every home machine uses the same route with cosmetic variations. The printed numbers on your machine are authoritative for that model; what follows is what each numbered point is doing, so you can tell when one has gone wrong.
Spool Pin and First Guide
Put the spool on the pin with the thread coming off in the direction the manual shows, and fit the spool cap if your machine has one. The cap stops the spool lifting and the thread catching under the rim. From there the thread goes into the first guide at the top back of the machine, which sets the angle for everything after it.
Thread quality shows up here. Old, dry thread sheds lint and snaps under tension, and no amount of correct threading fixes it. If breakage is your real problem, the causes are listed in order in the breaking thread checklist.
Down the Channel and Around the Tension
The thread now runs down a channel on the front left of the machine, around the bottom of the U, and back up. Inside that channel are the tension discs. On most machines they are hidden, so you cannot confirm visually that the thread seated; you confirm it by feel afterward.
The check: with the presser foot still up, pull gently on the thread. It should run almost freely. Now lower the presser foot and pull again. There should be clear resistance. If both feel the same, the thread missed the discs, so raise the foot and take it down the channel again.
The Take Up Lever
Coming back up the channel, the thread passes through the take up lever, the metal arm with a hole in it that rises and falls through a slot in the machine face. It is the part that pulls slack up after every stitch, and missing it is the second most common threading error after the presser foot.
This is why you turned the handwheel first. With the lever at its highest point the hole is exposed and easy to hook; halfway down it hides behind the face plate and people thread past it. Hook it from right to left, or as the arrows show, then bring the thread back down.
The Last Guides and the Needle
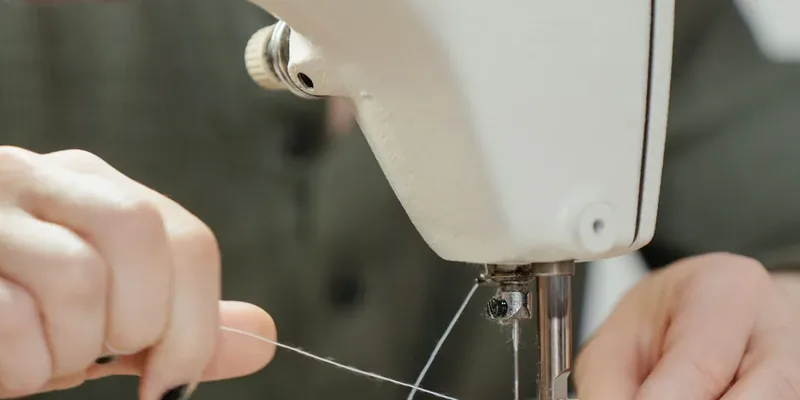
Below the take up lever the thread passes through one or two small guides just above the needle clamp. These keep the thread from swinging as the needle bar moves, and skipping them causes intermittent skipped stitches that come and go. Then the needle itself, threaded front to back on virtually all home machines.
If your machine has an automatic needle threader, lower the presser foot first if the manual says to, bring the needle to its highest position, then use the lever. If the hook misses, the needle is usually not fully at top, or it is inserted with the flat side turned the wrong way. Needle orientation is covered in our needle guide, along with which needle belongs in which fabric.
Bringing Up the Bobbin Thread
With the top thread through the needle, hold its tail loosely and turn the handwheel toward you one full rotation. The needle goes down, catches the bobbin thread, and brings up a loop. Pull that loop through with a pin or your fingers, then lay both tails back under the presser foot toward the rear.
Some machines with a drop in bobbin will pick the thread up automatically once you start sewing, and their manuals say so. Doing it by hand costs three seconds and prevents the bobbin thread from being dragged into the hook area on the first stitch, which is one cause of a thread nest under the fabric.
What Each Mistake Looks Like in the Stitch
The advantage of knowing the route is that the failed stitch tells you where you went wrong. The table below maps the symptom back to the point in the path, so you can rethread the specific bit instead of starting over blindly.
| What you see | Likely point in the path | Why it happens | Fix |
|---|---|---|---|
| Loops and nests underneath | Tension discs | Threaded with the presser foot down | Rethread with the foot raised |
| Thread snaps immediately | Take up lever missed | Lever was hidden mid stroke | Handwheel to top, rethread |
| Stitches skip now and then | Guides above the needle | Thread swings with the needle bar | Pass through both small guides |
| Thread unthreads at the start | Tails too short | Not laid back under the foot | Leave a hand span of tail |
| Machine will not pick up bobbin | Needle orientation | Flat side turned the wrong way | Reseat the needle fully up |
Notice that four of the five are top thread problems that look like bobbin problems. That is the single most useful thing to remember about threading, and it is why rethreading the top is always the first move when something goes wrong. If a nest is your recurring issue, the thread nest page works through it in order.
Rethreading as a Habit
Experienced sewers rethread constantly and do not treat it as a defeat. Change of fabric, change of thread color, a stitch that looked odd, coming back after a week away: rethread, and check the needle at the same time. It takes less time than picking out one bad seam.
The other habit worth building is the tension check described above, foot up then foot down, every time. It confirms the one point in the path you cannot see. When problems persist past a rethread, reading the stitch shows what a top thread and a bobbin fault look like in the seam.
Frequently Asked Questions
Does the presser foot really have to be up when threading? Yes, on virtually every home machine. The presser foot lever opens the tension discs, and only then can the thread seat between them. Threading with the foot down is the single most common cause of loose loops on the underside of a seam.
Which way do you thread the needle? Front to back on almost all home sewing machines, with the flat side of the needle shank facing the back of the machine. Sergers and some specialty machines differ, so check the diagram. Our guide to threading a serger covers that separate order.
Why does my thread keep coming out of the needle when I start? Usually the tails are too short or not laid back under the presser foot, so the first stitch pulls them free. Leave roughly a hand span of both threads behind the foot, and start with the take up lever at its highest point.
Is threading different on a computerized machine? No. The path is the same; computerized machines just add printed guidance, better lighting and sometimes a threading animation on the screen. The comparison in mechanical against computerized covers what actually differs between them.
My automatic needle threader will not catch. What now? Bring the needle to its highest position, check the needle is pushed all the way up into the clamp, and confirm the needle size suits the threader, because very fine and very heavy needles sometimes do not. Then thread by hand rather than forcing the hook.
The Bottom Line
Raise the presser foot, turn the handwheel until the take up lever is at the top, then follow the printed numbers from spool to needle. Check the tension by pulling the thread with the foot up and then down. Draw up the bobbin thread and lay both tails back. Get those steps in order and most of what looks like a machine fault disappears. Read next: winding a bobbin for the other half of the setup, the needle guide because a fresh needle solves what threading does not, and the beginner machine guide if you are still choosing.