Last updated: August 22, 2026
Standing in front of a wall of first sewing machines, or scrolling a page of them, the comparison collapses quickly. They all have a free arm. They all do a buttonhole. They all say beginner friendly. The stitch counts run from six to seventy and it is not obvious whether that is a big difference or no difference at all.
It helps to know that only three things reliably separate a first machine you keep from one you resent. Everything else on the spec sheet is either present on all of them or matters so rarely that you can decide it later. This is that short list, and what each item looks like when you check it in person or in a listing.
This article contains affiliate links. If you buy through them, we may earn a commission at no extra cost to you. Learn more.
Quick Answer
What should you look for in a first sewing machine?
- Control over speed, either a slider that caps it or a pedal you can genuinely feather.
- A drop in bobbin under a clear cover, so the lower thread supply is visible while you sew.
- A threading path printed clearly on the body, ideally with an automatic needle threader.
- Then, and only then, look at stitch count, feet included and the size of the table.
Bottom line: three features decide it. Everything else on the box is a tiebreaker.
Why Three Features and Not Thirty
Because those three are the ones you handle at every session, in every project, from the first hour onward. A feature you use weekly shapes your opinion of a machine. A feature you use once shapes nothing. That is the whole filter, and it survives contact with real sewing better than any scoring table.
The corollary is uncomfortable for spec sheets. Two machines with wildly different stitch counts can feel nearly identical to use, while two machines with the same stitch count can feel completely different because one has a speed slider and a lit bobbin window. The listing cannot show you that, which is why it leads with numbers instead.
Feature One: Speed You Can Hold Back
A first seam goes wrong at speed. The fabric runs away, the line wanders, and the instinct is to grab and pull, which is how needles bend. Anything that lets you sew slowly and deliberately is the single biggest contributor to a good first evening, and there are two ways machines offer it.
The Slider Versus the Pedal
A speed slider sets a maximum, so the machine cannot exceed it no matter how hard the pedal goes down. Computerized machines commonly include one, often alongside a start and stop button that runs the machine without a pedal at all. Mechanical machines usually leave pacing entirely to your foot.
Both work. The slider simply removes a skill from the learning pile, which matters if your hands are unsteady, if the machine will be shared with a child, or if you would rather spend the first week on straight lines than on pedal control. Check the kids machine guide if a young sewer is part of the plan.
Feature Two: A Bobbin You Can See
The bobbin holds the lower thread. Drop in bobbins sit in a cradle under the needle plate behind a clear cover, so you can see how much thread is left. Front loading bobbins sit in a metal case behind a small door at the front of the machine, hidden while you work.
Front loading systems are not worse at sewing. They are worse at telling you things. Running out mid seam and seating the bobbin the wrong way around are the two classic beginner failures, and a clear window catches both before they become unpicking. Our walkthrough of winding and seating a bobbin shows the step that causes most of the trouble.
Feature Three: A Threading Path You Can Read
Top thread runs from the spool, through a guide, down and around the tension discs, up through the take up lever, down past two more guides and into the needle. Get one of those wrong and the stitch fails in a way that looks like a broken machine. So the path needs to be legible.
Look for large printed numbers with arrows on the body of the machine, in a color that contrasts with the plastic. Look also for an automatic needle threader, a small lever that pushes the thread through the eye. It is the feature most appreciated by anyone who wears reading glasses, and it is now common even on modest machines. The full route is in our threading walkthrough.
What to Check After the Big Three
Once a machine clears those three, the rest is preference and project fit. The table below sorts the remaining spec sheet items into what changes your week and what does not, so you can stop comparing the ones that do not.
| Spec sheet item | Changes your week? | When it matters | Priority |
|---|---|---|---|
| Speed control | Yes, every session | Always, most of all at the start | Decisive |
| Bobbin style | Yes, every session | Always | Decisive |
| Threading aids | Yes, every session | Always | Decisive |
| Free arm | Sometimes | Cuffs, sleeves, pant legs | Check it exists |
| Stitch count | Rarely | Knits and decorative work | Tiebreaker |
| Wide table | Sometimes | Quilts, curtains, large panels | Nice to have |
The free arm deserves one line of its own. It is the narrow section left when you slide off the accessory tray, and it is what lets a pant leg or a sleeve go around the machine rather than being crushed flat under it. Nearly every modern machine has one; just confirm it before you buy.
Checking a Machine in the Store or the Listing
If you can put hands on it, do four things: raise and lower the presser foot lever, open the bobbin cover, run the machine at its slowest setting, and look at the threading numbers with the shop lighting overhead. That takes two minutes and tells you more than an hour of reading.
If you are buying online, the substitute is the listing photographs and the manufacturer page. Photographs show the bobbin cover and the printed threading path clearly, and the manufacturer specification page is the only place to trust for stitch counts, included feet and whether speed control is present. Retail copy repeats itself between models and is often out of date.
A Machine That Has All Three
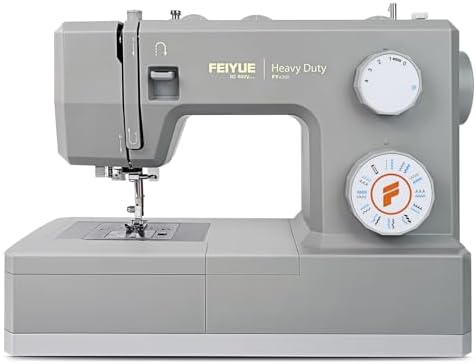
The straightforward version of this list is a mid weight mechanical or entry computerized machine with a drop in bobbin, an automatic needle threader and clearly printed threading numbers, from a brand that is easy to buy parts for. That description covers the most commonly bought first machines, and the picks page lines them up.
Frequently Asked Questions
How many stitches should a first sewing machine have? Enough for straight, zigzag, blind hem and a buttonhole, which every current beginner machine covers. More stitches are pleasant and rarely decisive. If you plan to sew knits, check that a stretch stitch is included and read which stitches you actually use.
Is a metal frame worth looking for? A metal internal frame keeps the machine planted and quieter on thick seams, and most mid range beginner machines have one under a plastic shell. It is a genuine advantage, but do not pay for the word alone; check whether the maker actually specifies an internal metal frame.
Should the first machine be mechanical or computerized? Either. Mechanical is more direct, computerized adds speed control and convenience buttons. The comparison in mechanical against computerized covers what differs in repairs, in stitch quality and in day to day feel.
What is the one thing beginners regret buying? A machine chosen on stitch count that turns out to have a hidden bobbin and no speed control. The second most common regret is a handheld gadget bought instead of a real machine for hemming. See what a handheld can and cannot do.
What should I budget for beyond the machine? Needles in a few sizes, decent thread, a second set of bobbins and a seam ripper, at minimum. That short list prevents most first month frustration. Our guide to the starter kit covers what belongs there and what does not.
The Bottom Line
Three features decide a first machine: speed you can hold back, a bobbin you can see, and a threading path you can read without the manual. Confirm those three, check the free arm exists, and treat stitch count, included feet and table size as tiebreakers. That order is what separates a machine you keep using from one that ends up in a cupboard. Read next: the full beginner buying guide and picks for six different situations.